Sunday 17 July 2011

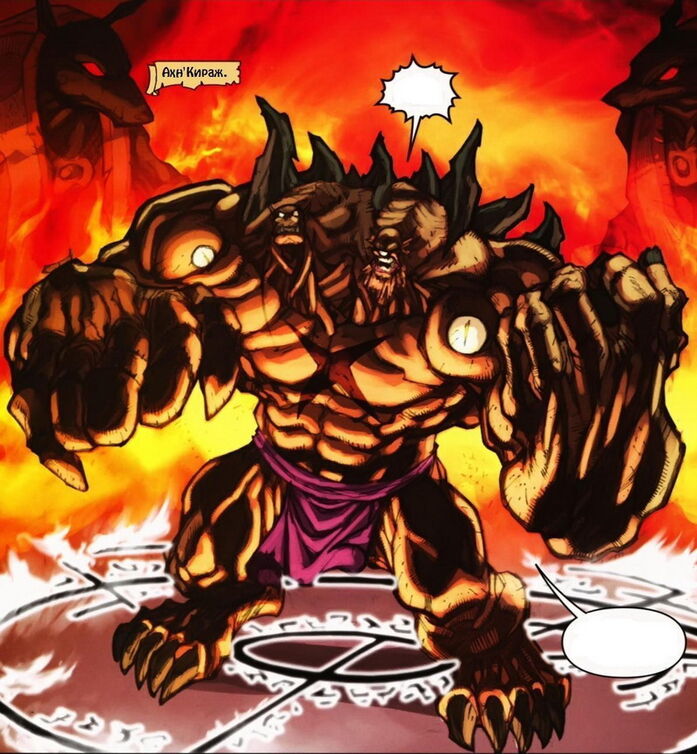
Ragnaros Defeated


This week we killed Ragnaros, the Firelord. In my opinion we spent way too much time on this guy, when the fight was actually pretty easy and predictable. Most of the time spent was mastering each phase and roster changes. Ragnaros requires very good raid awareness, communication, coordination and just really good play amongst all your raiders. If everyone gets to the point where they aren't making any mistakes until phase 3, then the fight is pretty much won. This is how we beat it.

Phase One: Everyone is positioned 6 yards apart and the tanks engage the boss. The only major tanking mechanic is tank swapping once the tank takes too many stacks of Raggy's debuff. Other than that you just watch out for flame waves from his Sulfrus Smash mechanic. You can do this by either being up in melee or positioning yourself at a diagonal  from the impact point.
  Throughout the fight he will do a single target knockback and an AOE knockback called Hand of Ragnaros. Just make sure you don't get knocked into a lava wave or a magma trap and I usually cycle my defensive cooldowns for each Hand. We didn't fully understand where it came from but we believe that if your casting within 6 yards of another player (or are in melee) when he casts one of these effects you could be spell locked for a few seconds.
  Finally Ragnaros throws down fire traps that will detonate if someone stands on them and launch the unsuspecting shmuck into the air to fall to his death. We had a priest detonate these and then slowfall himself since they will stay active the entire fight if not detonated. Eventually we switched to our Mage who could apparantly safely blink through them and then they would detonate.

First Intermission: In this phase Ragnaros smashes his hammer down in one of three places, which summons 8 fire dudes who speed straight towards his hammer. If they hit it they do massive damage and then wipe the raid. We had big elaborate diagrams to deal with this but they were too confusing so we ended up just assigning DPS to each add spawn depending on the position of the hammer.
   The adds move fast but slow down the lower their health is so the best way to deal with this phase is to tab target once the adds are half health and then finish them all off before they get to the hammer. We also used stuns, knockbacks and death grips to buy more time.

Second Phase: This phase is probably the hardest and most chaotic. It seems completely random and hectic but actually it isn't. It's a 100% predictable because all of the mechanics occur in exactly the same order. The only RNG is where the Engulfing Flames will appear but you can anticipate and avoid them easily.
  Sulfurus Smash returns as well as 2 other mechanics. Seeds will drop every minute on all raiders and if your quick you can actually dodge the impact. Everyone has to remain 6 yards apart or else you can take splash damage. They then will detonate and do damage depending on how far away you are from the seeds. Finally they spawn a bunch of elemental adds that can't be tanked and get AOEd down. How we handled this for the most part is grouped up 6 yards apart on one side of the platform and when seeds landed ran to the other side. Raid cooldowns were effective here to mitigate the damage from the seeds and the elementals.
  The final mechanic is engulfing flames, which is a simple fire wall that takes up one of three areas of the platform. Stay out of this. Our biggest challenge was after grouping up for the seed detonation either a flame wall or a smash will appear and kill a few players. We realized this was the predictable part and I'll explain the chain of events.
  Phase, Group up 6 yards apart east side. Smash. Seeds. group up west, 6 yards apart. Flame wall. Kill adds. Avoid smash by standing in melee. spread out, avoid wall. Seeds. Group up east in melee to avoid smash. wall. Spread 6 yards avoid smash. Seeds. Run west. Wall. Kill adds. Phase. If this makes sense to you, phase 2 is easy.

Second Intermission: Same as the first except a little tougher since two large adds spawn that have to be tanked. DPS ignored them and killed flame dudes. The large Scion adds put a debuff on you like engulfing shadows which leaves a flame trail in your steps and heals the little guys so you just kite away. We left one little add up but slowed to prolong this phase and killed one scion and brought the second down to like 30% to be finished off in phase 3. We would kill the little add and transition.

Final Phase: Sulfurus smash and Engulfing flames remain but are easier to avoid. The only change is he summons big rolling meteors which chase random player and must be kited around until they are hit, which then they change targets. Throughout the phase more will spawn and I think we had 4 out when we defeated him. How we tried to handle this is keep hitting the balls away from the raid until they targeted our Mage who would just blink kite them around all day. Other than that you just dps him until he's defeated.

  A pretty challenging fight but pretty simple once you master the mechanics. We didn't actually realize we beat him when our achievements popped up and he disappeared. We were like "huh, did we bug him or something?" but nope we just didn't know he was defeated once he hit 10% and felt cheated by how anti-climatic it was lol.
Saturday 16 July 2011

Firelands Normal Cleared


Well it's been 2 weeks and we have cleared all of Firelands normal mode content and in my opinion we could have cleared it a lot faster. I haven't posted in a bit because I've been very busy grinding my face off on Ragnaros. Well we killed him last night and he surprisingly isn't that hard if you have a good group with raid awareness.
Here are my thoughts on  the bosses we've downed since Ryolith.

Baleroc: We cleared this on 10 man before 25 but it's generally the same concept and requires very high coordination and communication amongst all your raiders. Basically imagine it as a lineup to use the bathroom and you have a strat for this shitty boss. Basically one person stands next to a crystal that spawns calls out the next person and they switch and you repeat that till he's dead. Healers have their own round robin strat that involves healing the sharded people (not SHARTED) to gain a buff and then switch to the tanks when a new crystal spawns. Tanks have their own switching thing to deal with as well.

Alysrazor: I think this boss is kind of fun although quite long and repetitive. Basically from my POV as an Unholy DK I would do the following:

Whole raid stacks up against the front wall close to the boss because there's a safe spot that will stop you from getting knocked back. I AMS the fire damage to get RP, blow CDS on the bird and follow behind it picking up 2 feathers for a speed buff. After that I DPS an add on one half of the room, avoid his brush fire and interrupt his fire cast. He dies and i go to the other side of the room and do the same to another add. This repeats twice for a total of 4 adds although there's kind of a lull between the 2nd and 3rd add where I pick up a third feather and fly up DPSing Alysrazor while getting the ring buffs before coming down and killing adds. Any other time where my add is dead, I'm running to the next or whatever free time I have, I DPS the Tank's Hatchling.

Phase 2 I finish off the Hatchling, start running counterclockwise down the "center track" and when Tornados spawn I hit AMS just in case I get clipped by a spawn. Then I pretty much chase down a tornado, run through hoops and when a tornado is about to catch me I switch to a different lane, turn around and chase one of the tornados going the other direction. Lots of people have trouble here but it's pretty easy as long as your chasing a tornado and not running straight into one. Finally I pop CDS, DPS Alysrazor as much as possible, drop my Anti-Magic Zone on the raid until he takes off and phase one repeats. Easy but fun fight.

Majordomo Staghelm: Once again another easy fight, pretty much a tank n spank fight for melee. The key to this fight is pushing Staghelm's adrenaline stacks as far as your specific raid can handle. There's no key number here, we can handle 10 stacks of his scorpion form although I'm sure other guilds cant.

Scorpion Form: Melee stacks up in front of the boss to soak damage and runs out when you wanna switch him to cat. That's the gist of it. A good tip for melee is you can DPS his arm and not get parries while still being enough in front of him to soak the damage. If you get molten seeds, just run out of the raid when you have 5secs left on your debuff.

Cat form:: DPS boss, DPS cats, Burning orbs not really your problem.

Stay posted cause I'll be writing about my Ragnaros experience next.

Friday 1 July 2011

So You Really Want to Kill Shannox


So you want to kill that meandering one eyed huntard? Well I did and I'm here to help you out. Not going to go through his abilities and what raid composition, that can be found in an earlier post. The biggest issue people are having is the fact that Shannox and Riplimb are untauntable. With these following tips you won't even need to worry about threat.

First off you have your entire raid just focus fire Rageface down, the extra damage on the tank is completely manageable and since your healers don't have to worry so much on the raid damage they can be redistributed to the tank.

Meanwhile your Main tank builds threat on Shannox and since the raid is on Rageface it shouldn't be a problem. Our biggest problem however was our tank stepping on fire traps and getting rocked by the boss. To combat this our tank just kited the boss around a large circle and since he was always moving there was never a chance of stepping on a trap. The bonus to this is the raid has to move as well to keep up so they have a lesser chance of stepping on traps.

The hardest part of this fight is having the Riplimb tank in charge of dropping both tanks debuff stacks. Once we figured it out the theory was pretty easy while the execution could be tricky. Whenever Shannox throws his spear he can no longer apply the tear debuff and Riplimb ceases to as well since he runs over to the spear and then brings it back to his master. By timing it right we were able to bring Riplimb into a crystal trap just after the spear's explosion freezing the dog in place for about 8 secs. During this time both tanks run opposite directions from the spear so when Riplimb breaks free he has to travel to Shannox and then back to the Riplimb tank which if you've done it correctly, both tanks debuffs have dropped.

Easy fight once you figure it out.

Firelands Week One


Patch Day. I'd have to say this was the smoothest patch day I have seen yet. Came home from work, logged on and ready to raid. No Server crashing, bugs, addon or DC problems, quite pleased. Before getting into how our raiding experience was I'd have to say the new dailies were pretty fun. Not a lot of time necessary and they generally had a sense of progression and reward. Now onto the good stuff.

Firelands Trash
  Have to say that Firelands trash is pretty damn annoying, basically everything was designed for melee players to feel useless and/or a flaming smear on the ground. Large golems that kick you into turtles. Turtles that knock you into exploding scorpions. Scorpions that chase you into roaming packs of snake men. Speedy elementals that show up and knock you into other elementals. Basically it all sucks and you have to kill a ton to make Shannox show up and if you don't kill him in a timely fashion you gotta start all over again clearing trash for another hour.

Shannox
We expected Shannox to be the easiest boss to start with but ended up being the hardest we had to face this week. Go figure. The most irritating thing about Shannox is he pats all around the zone and it takes around 5 mins so if your not ready to pull when he comes around you gotta sit on yer ass until he comes back around. He's got to be the biggest Huntard in wow. We spent about a day and a half on Shannox until we downed him.

The biggest curve ball despite all our preparations was the fact that Shannox and Riplimb are untauntable. This is pretty much what set us back from the start and it wasn't until wednesday that we found the right way to handle this. We tried several things such as 3 tanking with one tank on riplimb and two on Shannox. Threat was the biggest issue with MDs not really being much help and glyph of salvation giving moderate success in alloying the tanks to drop their stacks. Our best attempts were with 4 tanks however, adding another to Riplimb.

On our kill we just used two tanks, one on shannox, one on Riplimb. We discovered that if you time it right and trap Riplimb after the boss throws his spear, both tanks will drop their stacks because Shannox only gives stacks with his spear. Another big tactic was killing Rageface right off the bat which made the damage of the raid much more manageable as well as on the tank. To combat melee and tanks stepping on traps our Shannox tank just kited the boss around. First Boss downed.

Beth'tilac
If Shannox was the hardest boss we fought Beth was the easiest. We pretty much followed the strategy that I posted last week with some minor tweaks. We used 2 tanks, one top, one bottom. We sent a few melee up with the tank and 3 healers, who got the boss down around 78%. Down below we split up the ranged dps in 3 groups with frost traps on spiderling spawn points and one rogue with crippling poison and 2 warlocks with glyphed shadowflame in the other 2. This ensured that all the spiders were slowed between 50-70% and could easily be DPSd down. We had 2 melee on drones full time and the rest of the dps would hit the drone if they had nothing to do. My job as an Unholy DK was to deathgrip and taunt the spinners down and kill them. Once the team was up top I just attacked the drone until Smoldering Devestation then I would switch back to spinners.

The final phase was just a raid cooldown rotation and DPS burn. Easy.

Lord Ryolith
  With some attempts on Alysrazor we decided to hit Lord Ryolith first. In theory this fight is quite easy but we over complicated it so much that it took us about 3 and a half hours to down. The biggest issue was steering the bus as we liked to call it. We all had different ideas of how it should be done and it seemed people got confused because everyone was making calls in which way he should be turned. Basically what would happen is Ryolith would get way too close to the lava and just stand there pivoting slowly until we got him back on track. By that time there were way too many volcanos going off that we wouldn't be able to keep up.

I generally decided as an officer that we should just keep him constantly moving on a path which can kinda be seen on the terrain. That way he wouldn't be slowed down by hard turns and could just mow down volcanoes in his path even if we narrowly missed a couple. That worked but I was still competing with what other people  felt was a better way  to handle it. Finally on our kill attempt I got our raid leader to silence vent and I just made all the directions. I honestly just watched ahead of me  and backed up the boss like a truck into a parking space and kinda keep the next two volcanos in focus. I would call to walk straight into the nearest volcano and begin calling for a left turn to line up the following one. This worked, we won, last phase is a joke.

I'd have to say that this fight is 100% steering the raid and not the boss.

Wednesday 22 June 2011

Words, Words, Words, the Master Wants Murder


Day 2 on Heroic Cho'gall.

Weird lag issues in raid tonight affecting everyone. The kind that lets you chat but not being able to do anything in raid. Despite all Cho'gall's abilities, this appears to be the most puzzling. 47 mins after it seems we are ready to pound Cho'gall's face(s).

Today we didn't change much into the strategy, only add management being a factor. Purely range on elementals so melee doesn't have to be out of the group in case they get MCd.. The melee would switch onto adherents as soon as they entered and alternate assigned interrupts. So far however we've made zero progression and only seemed to step back, rarely reaching a second set of adherents.

Another case of the wednesdays for EL it seems where everything just seems to be going wrong and no one seems to take the encounter seriously.

Alysrazor Strategy


http://www.learntoraid.com/2011/06/16/alysrazor-video-strategy-guide-10-normal/


The Alysrazor encounter has 4 different Phases
The 1st Phase Alysrazor moves skyward and summons adds
The 2nd phase Alysrazor will summon Tornadoes throughout the area
The 3nd Phase is a Burn Phase where Alysrazor is immobile
The last phase is a Re-ignite phase where Alysrazor reignites and nukes the raid
After that she returns to Phase 1

Note: Currently this fight is undertuned. Blizzard may take actions to alter this fight.


Alysrazor

STEP 1: Start the fight and Healers wake up!


The raid moves in and pulls Alysrazor
Alysrazor will cast Firestorm immidiately, doing huge damage and knocks everyone back
Everyone is on low HP. Healers heal everyone up (100-120k per person)
Alysrazor moves to the other side and flies up
Alysrazor will loose a couple of feathers in the meantime (see step 4)

Step 2: Ground Phase

Split the raid in two evenly groups (DPS/heal wise):
One group moves to the entrance
One group moves to the spot where Alysrazor flied up
Two tanks stand in the middle
Talon Initiates
Alysrazor summons two adds called: Blazing Talon Initiate
Both groups (on each side) kill their add fast
Talon initiates will continuously spawn unkillable fire blobs that move around
Be sure to dodge these blobs
The two groups kill any talon that is summoned (each grp taking one half of the room)

Step 3: Hatchlings


Two tanks move to the middle, after the talons have spawned
Two eggs will be summoned which will hatch into 2 hatchlings
The 2 tanks each tank 1 hatchling
The hatchling will imprint the tank. This allow tank to do insane damage vs the hatchling
Make sure only the tanks attack and kill the hatchlings
Move the Hatchlings to the fire worms that spawn in the room
The Hatchlings will eat the worms , which will greatly debuff them
The tanks kill these adds

Step 4: Flying phase


Alysrazor drops 6 feathers when she moves up in the air
Two of your best ranged DPSers each pick 3 feathers up
These players will fly up and follow Alysrazor
Fly though all the orange rings to get a stacking buff
This buff increases your haste and flight time
The flying players need to alternate which player moves to the rings
You can cast spells while flying in the air, be sure to DPS Alysrazor
After a while your flight time runs up, be sure to save yourself when falling down

Step 5: Tornado Phase

Alysrazor will move to phase 2: Tornado Phase after 3 minutes
She will summon a tornado in the middle, move out of the middle
Alysrazor will summon tornados that fly around the room
Move to the marked save spot to dodge all tornados
The safe spot is located here

Burn Phase
After a minute the tornados disappear and Alysrazor will crumble in the middle
Alysrazor is immobile. Bloodlust and DPS Alysrazor down
Interrupt the talons that try to revive Alysrazor

Step 6: Re-ignite Phase

After 30 seconds Alysrazor becomes alive and begins to AOE the raid
Stack up and heal everyone to full
Tank her away from the raid
When she returns to 100% mana, she returns to phase 1
She will move to the air and summon talons again
Continue the same routine

Beth'Tilac Strategy

http://www.learntoraid.com/2011/06/17/bethtilac-video-strategy-guide-10-normal/


Beth’Tilac is a spider boss located in Firelands
-There is a large web ceiling where raiders can move up to by clicking the threads
-The raid is split in 2 groups: one group below and one group above the web
-Kill Beth’Tilac and all spawning adds before she kills the raid
-Beth’Tilac is a soft-enrage fight: You have to kill her before her damage becomes unhealable

Step 1: Pull and DPS Beth'Tilac

-The raid moves in and pulls Beth’Tilac
-Beth’Tilac retreats up to the safety of her web on the ceiling
-Spiders will spawn in the middle on threads. Kill the spiders The threads will stay.
-If Beth’Tilac is not engaged she will cast Venom Rain which does massive damage
-So one group needs to move up the web to engage Beth’Tilac to stop Venom Rain
-The rest of the raid stays on the ground and deals with the adds

Step 2: Group Above the Web

Assign one (elite) team to move up the threads. This consists of:
-10man: 1 tank, 1 healer and 2 melee
-25man: One tank, 2 healers and 5/6 melee

-Use the threads to climb up the web . Only one person can climb each string
-Beth’Tilac will use the following abilities when she is tanked on top of the web:

Meteor Burn

-Beth’Tilac casts a Meteor Burn. Move out of the impact zone.


Smoldering Devastation

-Beth’Tilac has an energy meter (called Fire Energy)
-Whenever this is at 0 energy, she will cast Smoldering Devastation
-This ability will kill you wipe (immolate aura doing 40K damage per sec)
-In order to dodge this, you will need to jump down the hole in the middle of the web
-Assist on killing any big spiders when you are on the ground
-Make sure to move back up after Smoldering Devastation is gone.

Step 3: Group Below the Web.

-The group on the ground is positioned in the north like this


-The groups deals with the following adds like this:

Cinderweb Spinner

-These spider hang on thread. They always spawn in the middle


-Let 1 ranged DPS (10man) or 2/3 ranged DPS (25man) kill these spinners
-These spiders deal mediocre damage and continue to spawn during the fight

Cinderweb Drones

These are big spiders that need to be tanked here


-Do not stand in front of the adds (they use an acid cone)


-If these spiders run out of energy they will move up the ceiling to heal the boss
-So kill the big spiders before they run out of energy

Cinderweb Spiderlings

-Beth’Tilac occasionly summons small adds that spawn left and right of the middle


-If these small adds reach the other spiders or the boss, they will get consumed and heal them
-The small spiders are high killing priority and need to be AOE’ed down fast 

Step 4: Beth'Tilac moves down her web

-Beth’Tilac moves down after 3 Smoldering Devastations
-You need to have Beth Tilac down to about 70-75% now
-Any % higher means your DPS is too low (move more people up the web)
-Make sure that all big spiders are killed when she moves down

Positioning

-The raid is positioned in a triangle like this when Beth’Tilac is on the ground


-Beth’Tilac uses the following abilities in this phase

Abilities

-She gains a stacking buff called Frenzy which does more damage over time
-This is a soft enrage timer: Beth Tilac damage will become unhealable at some point
-She also cast The widow’s Kiss on a tank. This is a stacking debuff
-The debuff reduces healing and gives the tank an aura that damages nearby allies (stacks up)

In order to deal with this do the following:

Tank Rotation

-The maintank tanks Beth’Tilac
-At some point (randomly) she casts The Widow’s Kiss on the maintank
-The offtank takes over, the maintank moves to the offtank positioning
-The offtank tanks Beth’Tilac for 20 seconds
-The maintank takes over, etc.
-Why 20 seconds? Is the exact time for the debuff to run out
-Continue the same routine and kill Beth’Tilac


~written by Peekingtom of Exiled Legion~

Heroic Nefarian Down!


Last Tuesday marked a moment in history for my guild Exiled Legion and my server Doomhammer. Short history lesson being that there have always been 2 hardcore progression on Doomhammer, Drow and Singularity. Drow being a top 100 guild who clears everything and Singularity resting at 2, clearing most content due to their 20 hour a week raid schedule. Well all that changed on Tuesday he 14th 2011 when Exiled Legion downed Heroic Nefarian and took the mantle of second on the server. This has been such a bold statement for Doomhammer, now a casual hardcore guild with a 9 hour a week raid schedule can over take  a guild that just raids so much more. This all comes down to the hours of research we put in to strategies and the power of our raiders to succede against all odds. I really hope this carries over into Firelands in 4.2.

I'm not going to go too far into our strategy but it consisted of a lot of practice and it's fortunate that we never really had much a problem with cinders in phase and interrupts in ph2. Our biggest challenge was DC issues and DPS. Getting our rogues and Warlocks to apply 70% slows was clutch in increasing overall raid DPS.

Being an offspec Blood DK, I was the best choice to MT Nefarian and I have to say that was probably the most intense fight I've ever had to Tank. It's not hard by any means but it just took shear stamina and willpower to last to the end in phase 3. The fight slowly builds up but at the end I pretty much had to constantly focus on rotating Nefarian so our Add tanks could keep kiting the bone constructs and I could avoid the shadowflame. Props go out to Liltroll who made the hardest job of add tanking look easy, he was key to downing this fight. Hell props go out to everyone, the healers with their CD rotations and the DPS pushing us a few seconds passed the enrage and downing the boss.

Very Intense Fight. Here is your chance to witness the madness.

Tuesday 21 June 2011

Heroic Cho'Gall 25 Second Week


Today we went back to Heroic Cho'gall and did better.... well better than last week in anyways. We changed our strat back to what we were used to on normal mode with the group stacking up in melee range so our boomkins can typhoon MC'd targets. Our warriors and hunters would DPS down the fire and shadow elementals to lower the stacks on Cho'gall and they would also watch each other's backs if they were MCd out of the Boomkin's range. Overall there was a lot less worship stacks on Cho'gall and didn't have much trouble during the stack up phase.

When the corrupted adherents spawned we would spread out a bit to avoid shadow crashes although some ranged would spread out way to far to the right or left and not be able to be broken from a MC. Our raid was plagued by DCs due to storms or whatever so ideally we would use our 2 enhancement shamans to interrupt Depravity, however one was not able to play. To counter this our warriors would pull off the elemental to handle interrupts on the adherents and I would switch off Cho'gall and DPS down the elemental. I noticed a lot of tank and raid deaths were because there wasn't much damage going onto the elemental, it seemed with the addition of the adherents and blood ads, our hunters couldn't focus on slowing adds and DPSing elementals. Finally we would then stack up as soon as the blood spawned and then funnel them down the center to the raid. Well this was the theory, but we found slows weren't slowing enough and they weren't dying fast enough. That's the strategy in a nutshell and I won't even touch on what the mages have to do.

Generally tho, progress was pretty good. We went from 85% wipes to around 65%, with our best attempt at 50%. We seem to be getting through one adherent phase "alright", reaching the second and usually wiping but have gotten to the 3rd a few times. There are a lot of individual awareness problems tho which in theory should resolve themselves once people become more comfortable. The biggest problem being corruption which can get out of hand pretty fast on heroic. People stand in shadow crashes, depravity doesn't get interrupted, The accelerated debuff doesn't get cleansed fast enough and people throw up on each other. I personally don't find it that much more difficult to avoid than normal mode but since it's heroic mode people seem to freak out about it.

We have one week to kill this fight before 4.2. Is it possible? Last week I would have told you not a chance but this week it seemed like it could be doable. Two more raid nights however seems pretty lofty, we'll have to see.

Monday 20 June 2011

Shannox Strategy

With Firelands coming up my guild is being ultra prepared for it. The following is the strategy we are going to use for Shannox and the original strategy we analyzed.


Wall of strategy text could kill this boss!

Shannox is a tank and spank fight with 2 dogs
-Shannox spawns traps which damages all players and his dogs
-Dodge the traps, DPS the adds down. Then finish Shannox off.

Step 1: Assignments for Shannox

The raid uses the following assignments:

Tank Assignment
-The MT and OT tank Shannox and Riplimb
-Rageface has no aggro-table and will be loose within the raid

DPS Assignments

-2/3rd of your Melee DPS focus on Riplimb
-2/3rd of your Ranged DPS focus on Rageface
-1/3 Melee DPS and 1/3 ranged DPS on Shannox

Kill order

-DPS Shannox down to 35% and all adds to 5%
-After this: Kill the dogs and DPS Shannox down
-This ensures that the dogs will not enrage and destroy the raid when Shannox reaches 30%
-Shannox will enrage at 30% and does a lot more damage

Step 2: Pull and DPS Shannox

-Clear all the trash in the sight to have a large safe area
-The maintank moves in and pulls Shannox
-Riplimb always attacks person with highest thread , which is MT Rageface is loose in the raid, all spread out

Step 3: Abilities of Shannox

Shannox uses the following abilities:

-Shannox uses Jagged Tear on the MT
-MT tanks Shannox for 30 seconds
-OT taunts and takes over Shannox plus Riplimb
-30 seconds is the exact time for the debuff to run out

Hurl Spear:

-Shannox throws a spear to a random player which deals massive damage
-Shannow will indicate the impact zone, move out of this zone
-The MT will die if he stays within the impact zone
-This will leave a large circle of fire, move out of the lines

Arching Slash:

-Shannox occasionally use Arching Slash on the tank
-Nobody except the tank stand in front of him
-This means that the OT stands with the raid!

Step 4: Shannox's Traps

-Shannox cast 2 kind of traps during this fight continiously
-These traps will spawn underneath players
-You have 2 seconds to move out of these traps

Immolation Trap:

-This trap does large fire damage when stepped into

Crystal Prison Trap:

-This trap will put the player into a prison with 140k hp (25man)
-The traps look different and are easy to spot

-Just remember: Traps also work on dogs

However: this is not mandatory but helps on DPSing the adds down faster

Step 5: Final Phase of Shannox


-DPS both dogs down to 5% and Shannox down to 35%
-Kill both dogs down now

Frenzy:

-Shannox goes into a frenzy , he does more DPS and spawns more traps
-He not use hurl spear but instead uses magma rupture .
-Heal through this Shannox keeps using jagged Tear, so keep swapping tanks
-Bloodlust and DPS down Shannox

http://25man.com/firelands/shannox
http://www.learntoraid.com/2011/06/05/shannox-video-strategy-guide-25-normal/